

Easy Steps for Propagating Star Jasmine at Home! is a comprehensive guide for gardeners of all skill levels, providing simple and effective methods to multiply your star jasmine plants. This fragrant vine, known for its delicate white blooms and sweet aroma, can be easily propagated at home using a variety of techniques.
Whether you’re a seasoned gardener or just starting out, this article will equip you with the knowledge and tools to successfully propagate your own star jasmine plants.
Star jasmine is a popular choice for home gardeners due to its ease of care, adaptability, and stunning floral displays. By propagating star jasmine at home, you can create new plants to adorn your garden, share with friends, or simply enjoy the satisfaction of growing your own.
Introduction to Star Jasmine
Star jasmine, scientifically known as Trachelospermum jasminoides, is a popular choice for gardeners and home decorators alike. Its captivating fragrance, delicate star-shaped flowers, and lush foliage make it a beautiful and versatile addition to any space. The plant’s ability to thrive in various climates and its ease of propagation further enhance its appeal.Star jasmine’s popularity stems from its versatility and low-maintenance nature.
It can be grown as a climbing vine, cascading over walls or fences, or as a groundcover, adding a touch of elegance to gardens. Its fragrant flowers, which bloom in abundance during the summer months, fill the air with a sweet and intoxicating aroma.
The plant’s adaptability and ease of care make it a favorite among novice gardeners and experienced enthusiasts alike.
Benefits of Propagating Star Jasmine at Home
Propagating star jasmine at home offers numerous advantages, including cost-effectiveness, the ability to create new plants for personal use or gifting, and the satisfaction of nurturing a new life from a parent plant.
- Cost-effectiveness:Propagating star jasmine at home allows you to expand your collection of plants without incurring the expense of purchasing new ones from nurseries or garden centers.
- Customization:You can choose the specific type of star jasmine you want to propagate, ensuring it aligns with your aesthetic preferences and gardening needs.
- Sharing and Gifting:Propagating star jasmine provides an opportunity to share your passion for gardening with friends and family by gifting them new plants.
Characteristics and Growth Habits of Star Jasmine
Star jasmine is a fast-growing, evergreen vine with a vigorous growth habit. Its glossy, dark green leaves are oval-shaped and arranged in pairs along the stems. The plant produces fragrant, white, star-shaped flowers that typically bloom from late spring to early fall.
- Growth Rate:Star jasmine can grow up to 10-15 feet per year, making it a fast-growing and effective choice for covering walls, fences, or trellises.
- Sunlight Requirements:The plant thrives in full sun to partial shade, requiring at least 4-6 hours of sunlight daily.
- Soil Preferences:Star jasmine prefers well-drained soil with a slightly acidic to neutral pH level.
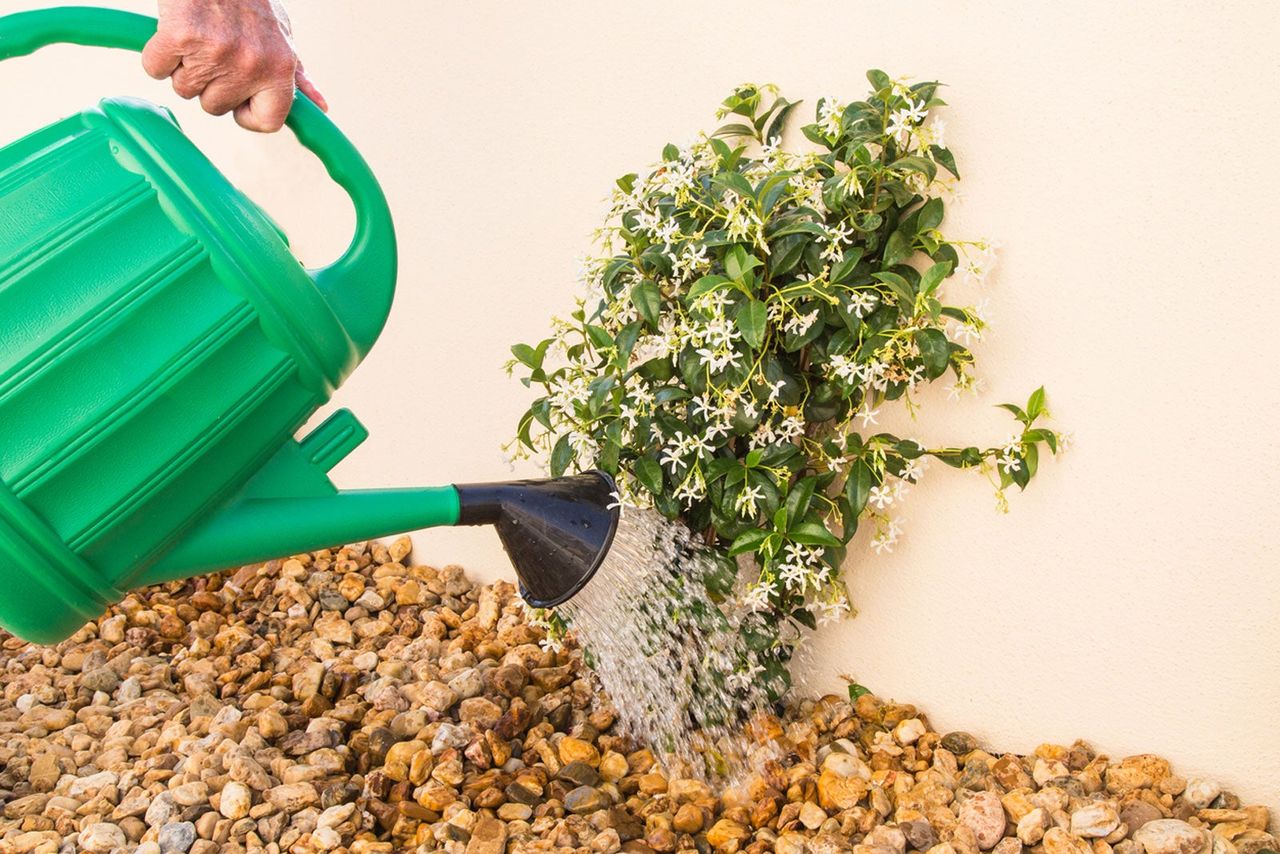
- Water Needs:The plant needs regular watering, especially during dry periods, but it can tolerate some drought conditions.
- Pruning:Regular pruning is essential to maintain the shape and size of star jasmine. Pruning can also encourage more flowering and a bushier growth habit.
Choosing the Right Time and Method: Easy Steps For Propagating Star Jasmine At Home!

The success of propagating star jasmine depends heavily on choosing the right time and method. The ideal time to propagate star jasmine is during the spring or summer when the plant is actively growing and has plenty of energy to dedicate to root development.
However, the best method for you will depend on your experience level and the resources available.
Cuttings
Cuttings are the most common method for propagating star jasmine. This method involves taking a piece of stem from the plant and encouraging it to develop roots.
- Taking Cuttings:Choose a healthy, non-flowering stem that is about 6-8 inches long. Make a clean cut just below a node (the point where a leaf grows).
- Preparing Cuttings:Remove the leaves from the bottom 2-3 inches of the stem. Dip the cut end of the stem in rooting hormone powder to encourage root growth.
- Planting Cuttings:Plant the cuttings in a pot filled with a well-draining potting mix. Keep the potting mix moist but not soggy. Place the pot in a bright, indirect light location.
Layering
Layering is another effective method for propagating star jasmine. This method involves encouraging roots to develop on a stem that is still attached to the parent plant.
- Choosing a Stem:Select a healthy, flexible stem that is near the ground.
- Making a Cut:Make a shallow cut about halfway through the stem, about 2 inches from the tip.
- Pinning the Stem:Bend the stem down and pin it to the ground using a wire or stone. Cover the cut area with soil.
- Maintaining Moisture:Keep the soil moist and wait for the stem to develop roots, which may take several weeks to a few months.
Seeds
Propagating star jasmine from seeds is the least common method, but it is possible. This method involves planting seeds from the fruit of the plant.
- Collecting Seeds:Collect the seeds from ripe star jasmine fruit. Remove the fleshy part of the fruit and clean the seeds.
- Sowing Seeds:Sow the seeds in a pot filled with a well-draining potting mix. Keep the potting mix moist but not soggy. Place the pot in a bright, indirect light location.
- Germination:Star jasmine seeds can take several weeks to germinate.
Best Method for Beginners
Cuttings are the easiest and most reliable method for beginners. They are simple to take and root, and they typically produce new plants quickly. Layering is also a good option for beginners, but it can be a bit more time-consuming.
Propagating from seeds is the most challenging method and is not recommended for beginners.
Step-by-Step Guide to Propagation by Cuttings
Propagating star jasmine from cuttings is a simple and rewarding method to expand your collection of this fragrant vine. This technique involves taking a piece of the plant, encouraging it to develop roots, and then planting it as a new, independent plant.
The process is straightforward, even for beginner gardeners.
Preparing Cuttings
To start, select a healthy star jasmine plant that is actively growing. Choose a stem that is free of disease or damage. It’s best to use stems that are semi-hardwood, meaning they are not fully mature but have hardened somewhat.
These stems are typically found in the middle of the plant.
Choosing the Right Cuttings
Cuttings should be approximately 4-6 inches long. Each cutting should have at least three nodes, which are the points where leaves grow from the stem. The presence of nodes is essential because roots will develop from these points.
Preparing the Cutting Medium
A suitable cutting medium provides the necessary support and moisture for the cuttings to root. You can use a well-draining potting mix, a mix of peat moss and perlite, or even water. If using a potting mix, ensure it’s moist but not soggy.
Want to fill your garden with the sweet fragrance of star jasmine? It’s easier than you think! Propagating star jasmine at home is a simple and rewarding process. For a comprehensive guide on the techniques involved, check out this beginner-friendly article: How to Propagate Star Jasmine: A Beginner’s Guide!.
After reading, you’ll be well-equipped to start your own star jasmine cuttings and enjoy their beauty in no time!
For water propagation, use a clean container and change the water every few days to prevent bacteria growth.
Rooting the Cuttings
Once you have your cuttings, prepare them for rooting.
- Use a sharp knife or pruning shears to make a clean cut at an angle just below a node. This angled cut helps increase the surface area for root development.
- Remove the leaves from the bottom inch or two of the cutting to prevent them from rotting in the rooting medium.
- Dip the cut end of the cutting in rooting hormone (optional). Rooting hormone contains plant growth regulators that can stimulate root growth.
To root your cuttings, you can use a variety of methods:
- Potting Mix:Insert the prepared cuttings into the potting mix, ensuring that the nodes are buried below the soil line. Water thoroughly and place the pot in a bright, indirect light location.
- Water:Place the cuttings in a clean glass or jar filled with water, making sure the nodes are submerged. Change the water every few days to prevent bacterial growth.
Maintaining Humidity and Light Conditions
Maintaining optimal humidity and light conditions is crucial for successful root development.
- Humidity:To increase humidity, cover the cuttings with a plastic bag or dome. This creates a mini-greenhouse environment that traps moisture and warmth. You can also mist the cuttings regularly to maintain moisture levels.
- Light:Place the cuttings in a bright, indirect light location. Avoid direct sunlight, which can scorch the leaves and hinder root development.
Step-by-Step Guide to Propagation by Layering
Layering is a simple and effective method for propagating star jasmine, which involves encouraging roots to develop on a stem while it is still attached to the parent plant. This technique is particularly advantageous because it creates a new plant that is genetically identical to the parent, ensuring you inherit all the desirable traits, like its fragrant flowers.
Air Layering
Air layering is a technique that involves encouraging roots to develop on a stem that is still attached to the parent plant. This method is particularly effective for star jasmine because it allows you to propagate even woody stems.
- Choose a healthy stem:Select a mature, non-flowering stem on your star jasmine plant. Ideally, the stem should be about the thickness of a pencil.
- Prepare the stem:Make a shallow cut, about 1 inch long, on the stem. Remove a small section of bark around the cut, exposing the cambium layer.
- Apply rooting hormone (optional):If desired, apply a rooting hormone powder to the exposed cambium layer to stimulate root growth.
- Wrap the cut area:Wrap the cut area with a moist sphagnum moss or peat moss. Secure the moss with plastic wrap or aluminum foil, ensuring it is tightly sealed to retain moisture.
- Monitor the progress:Keep the moss moist by periodically misting it with water. Over time, roots should develop within the moss. This process typically takes several weeks, but it can vary depending on environmental conditions.
- Separate the new plant:Once roots have formed, carefully cut the stem below the rooting area and remove the moss. You can now plant the new plant in a pot filled with well-draining potting mix.
Tip Layering
Tip layering is a simpler method compared to air layering. It involves bending a stem towards the ground and encouraging it to root where it touches the soil.
- Select a flexible stem:Choose a healthy, flexible stem that can be easily bent towards the ground.
- Make a shallow cut:Make a shallow cut on the underside of the stem, about 1 inch from the tip.
- Bend and bury the stem:Gently bend the stem towards the ground and bury the cut portion in the soil. Secure the stem in place with a rock or a wire hook.
- Monitor the progress:Keep the soil moist and watch for signs of new growth. Once roots have developed, the stem will have established itself as a new plant. This process can take several weeks, depending on the environmental conditions.
- Separate the new plant:Once the new plant has developed a strong root system, you can carefully cut it from the parent plant.
Step-by-Step Guide to Propagation by Seeds
Propagating star jasmine from seeds is the least common method, as it can be quite challenging. Star jasmine seeds are small and have a low germination rate, and the process can be time-consuming. However, if you’re looking for a unique way to grow your star jasmine, this method can be rewarding.
Collecting Viable Seeds
The first step in propagating star jasmine from seeds is to collect viable seeds from mature flowers. Once the flowers have finished blooming, they will produce small, brown seed pods. The pods should be allowed to dry completely on the vine before harvesting.
Once the pods are dry, you can carefully crack them open and collect the seeds.
Preparing the Seed Starting Mix and Sowing the Seeds
To germinate star jasmine seeds, you need a well-draining seed starting mix. You can use a commercial seed starting mix or create your own by combining equal parts peat moss, vermiculite, and perlite. Moisten the seed starting mix thoroughly before filling seed trays or small pots with drainage holes.
Sow the seeds thinly on the surface of the seed starting mix and gently press them into the soil. You can lightly cover the seeds with a thin layer of the seed starting mix, but avoid burying them too deeply.
Keep the seed starting mix consistently moist, but not soggy.
Optimal Light and Temperature Conditions for Seed Germination
Star jasmine seeds need warm temperatures and bright, indirect light to germinate. The ideal temperature range for germination is between 70-75°F (21-24°C). You can provide warmth using a heat mat placed underneath the seed trays. The seed trays should be placed in a bright location, but avoid direct sunlight, which can dry out the soil and damage the seedlings.
Transplanting Seedlings into Individual Pots, Easy Steps for Propagating Star Jasmine at Home!
Once the seedlings have developed a few sets of true leaves, they are ready to be transplanted into individual pots. Choose pots that are slightly larger than the seedlings’ root balls. Carefully loosen the seedlings from the seed starting mix and gently place them in their new pots.
Fill the pots with a well-draining potting mix and water thoroughly.
Caring for Your New Star Jasmine Plants
Congratulations! You’ve successfully propagated your star jasmine and now have a new plant ready to flourish. But just like any new plant, it needs the right care to thrive. Providing the right conditions will ensure your star jasmine grows healthy, strong, and produces its fragrant blossoms.
Light Requirements
Star jasmine thrives in bright, indirect light. Direct sunlight can scorch the leaves, especially during the hottest part of the day. Place your new plant in a location that receives several hours of sunlight each day, but avoid direct sunlight, particularly in the afternoon.
You can also use a sheer curtain to filter the light if needed.
Watering Needs
Maintaining the right moisture level is crucial for star jasmine. Allow the top inch of soil to dry out between waterings. Overwatering can lead to root rot, a serious issue that can kill your plant. During the growing season (spring and summer), water more frequently.
Want to add a touch of fragrant beauty to your home? Easy Steps for Propagating Star Jasmine at Home! will guide you through the process, from taking cuttings to nurturing new plants. And while you’re tending to your garden, why not consider a fun family outing to Family Fun and Fresh Produce Await at Harvest Moon Farm! ?
After a day of fresh air and farm fun, you’ll be ready to return to your own garden and marvel at the growth of your newly propagated Star Jasmine.
In winter, when the plant is dormant, reduce watering.
Nutrient Requirements
Like any plant, star jasmine needs nutrients to grow strong and healthy. Feed your plant with a balanced liquid fertilizer every few weeks during the growing season. Avoid over-fertilizing, as it can burn the roots.
Importance of Drainage
Proper drainage is essential to prevent root rot. Ensure the pot has drainage holes to allow excess water to escape. You can also add a layer of gravel or pebbles at the bottom of the pot to improve drainage.
Pruning Young Plants
Pruning young star jasmine plants helps to encourage bushier growth. Pinch off the growing tips of the stems to encourage branching and create a fuller, more compact plant. This can be done throughout the growing season.
Pests and Diseases
Star jasmine is generally pest-resistant, but they can be susceptible to certain pests and diseases.
Common Pests
- Spider mites:These tiny pests suck sap from the leaves, causing them to turn yellow and drop. Signs of spider mites include fine webbing on the leaves and tiny red dots.
- Mealybugs:These white, fluffy insects feed on the sap of the plant, causing stunted growth and yellowing leaves.
They are often found in clusters in the leaf axils and on the undersides of leaves.
- Aphids:These small, pear-shaped insects suck sap from the leaves, causing them to curl and become distorted. They can also secrete honeydew, which attracts ants and can lead to sooty mold.
Common Diseases
- Root rot:This fungal disease is caused by overwatering and poor drainage. It can cause the roots to turn brown and mushy, leading to wilting and leaf drop.
- Leaf spot:This fungal disease causes brown or black spots to appear on the leaves.
It is often caused by wet leaves and poor air circulation.
Dealing with Pests and Diseases
Pests
- Use insecticidal soap:This is a safe and effective way to control pests without harming beneficial insects.
- Introduce beneficial insects:Lacewings, ladybugs, and parasitic wasps are natural predators of many pests.
- Handpick pests:If you have a small infestation, you can simply handpick the pests off the plant.
Diseases
- Improve drainage:Ensure the pot has drainage holes and that the soil is not compacted.
- Avoid overwatering:Allow the top inch of soil to dry out between waterings.
- Remove infected leaves:If you see signs of leaf spot, remove the infected leaves and dispose of them properly.
Troubleshooting Common Issues
While propagating star jasmine is generally straightforward, you may encounter a few hurdles along the way. Don’t worry, most of these issues can be addressed with a bit of patience and the right techniques.
Slow Root Development
If your cuttings or layers are taking longer than expected to develop roots, it could be due to several factors.
- Insufficient Humidity:Star jasmine cuttings thrive in humid environments. If the air around them is too dry, they may struggle to develop roots. Consider using a humidity dome or misting them regularly to maintain optimal humidity levels.
- Poor Drainage:Overwatering can lead to root rot, hindering root development. Ensure the potting mix is well-draining and avoid letting the soil become waterlogged.
- Incorrect Temperature:Star jasmine cuttings require warm temperatures for optimal root development. Keep them in a warm location, ideally between 70-75°F (21-24°C).
Wilting
Wilting in star jasmine cuttings or layers is often a sign of dehydration.
- Underwatering:Star jasmine prefers consistently moist soil. Allow the top inch of soil to dry out between waterings, but don’t let it completely dry out.
- Root Rot:Overwatering can lead to root rot, which prevents the plant from absorbing water. If you suspect root rot, repot the cutting or layer in fresh, well-draining soil.
- Stress:Sudden changes in environment, such as temperature fluctuations or excessive sunlight, can cause wilting. Gradually acclimate your new plant to its new location to minimize stress.
Pests
While star jasmine is generally pest-resistant, they can occasionally be susceptible to common garden pests like aphids, mealybugs, and spider mites.
- Aphids:These tiny insects suck sap from the plant, causing yellowing and stunted growth. You can control aphids with insecticidal soap or a strong jet of water.
- Mealybugs:These white, cottony insects feed on plant sap, causing yellowing and wilting. You can remove them manually with a cotton swab dipped in rubbing alcohol or use insecticidal soap.
- Spider Mites:These tiny, spider-like creatures spin webs on the underside of leaves and feed on plant sap, causing yellowing and speckling. You can control spider mites with insecticidal soap or a strong jet of water.
Patience and Perseverance
Remember, propagating star jasmine takes time. Be patient and persistent. If you follow the steps carefully and provide the right conditions, you’ll be rewarded with beautiful new plants.
Enjoying Your New Star Jasmine Plants

Now that you’ve successfully propagated your star jasmine plants, it’s time to enjoy their beauty and fragrance. These versatile plants offer numerous ways to enhance your home and garden.
Displaying Your Star Jasmine Plants
Showcasing your newly propagated star jasmine plants can be a delightful way to enjoy their beauty and fragrance. Here are some ideas:
- Planters and Pots:Star jasmine thrives in containers, allowing you to strategically place them around your home or patio. Choose decorative pots that complement your existing decor and provide adequate drainage.
- Hanging Baskets:The cascading nature of star jasmine makes it perfect for hanging baskets. Place them near doorways, windows, or balconies to create a fragrant welcome.
- Trellises and Arbors:Star jasmine can be trained to climb trellises and arbors, creating a stunning vertical display. This is ideal for covering walls, creating privacy screens, or adding a touch of elegance to your garden.
- Ground Cover:In warmer climates, star jasmine can be used as a ground cover, spreading its fragrant blooms across the landscape.
Uses of Star Jasmine in Landscaping and Home Decor
Star jasmine’s versatility makes it a popular choice for various landscaping and home decor purposes:
- Fragrant Gardens:Star jasmine’s sweet, intoxicating fragrance adds a delightful aroma to any garden or outdoor space.
- Privacy Screens:Trained on trellises or fences, star jasmine can provide a natural privacy screen, blocking unwanted views and creating a secluded oasis.
- Ground Cover:Star jasmine’s trailing habit makes it an effective ground cover, suppressing weeds and adding a touch of beauty to bare patches.
- Indoor Decor:Star jasmine can be grown indoors in bright, indirect light, adding a touch of fragrance and greenery to your home.
Maintaining the Health and Beauty of Your Star Jasmine Plants
To ensure your star jasmine plants thrive and continue to produce their beautiful blooms, follow these maintenance tips:
- Regular Watering:Star jasmine prefers moist soil but can tolerate some dryness. Water deeply when the top inch of soil feels dry.
- Fertilization:Feed your star jasmine plants with a balanced fertilizer during the growing season (spring and summer).
- Pruning:Prune your star jasmine plants after flowering to encourage bushier growth and more blooms.
- Pest and Disease Control:Monitor your star jasmine plants for signs of pests or diseases. Treat any problems promptly to prevent them from spreading.
Final Conclusion
Propagating star jasmine at home is a rewarding experience that allows you to expand your garden with this delightful vine. With a little patience and the right techniques, you can easily create new plants from cuttings, layering, or seeds. Whether you choose to fill your own garden with star jasmine or share your success with others, propagating this fragrant beauty is a wonderful way to connect with nature and enhance your home’s ambiance.
Clarifying Questions
How long does it take for star jasmine cuttings to root?
Star jasmine cuttings typically take 4-6 weeks to develop roots, but this can vary depending on the method, environment, and cutting’s health.
Can I propagate star jasmine from seed?
While possible, propagating star jasmine from seed is more challenging and time-consuming than using cuttings or layering. It requires patience and careful attention to detail.
What is the best time of year to propagate star jasmine?
Spring and early summer are the ideal times to propagate star jasmine as the plant is actively growing and has ample energy for root development.
